A Well Written Montessori Lesson Plan Goes A Long Way
To write a great Montessori lesson plan, a teacher must consider both the educational standards and the abilities of the student.
The purpose of a well-written lesson plan is two-fold. The first. is to assist the teacher in lesson preparation. The second is to enable the director to ensure school standards are well met.
Of course, ideally, the educator must plan on using appropriate Montessori materials, understanding the stages of development, and setting the lesson in a Montessori classroom. But once you consider all those factors, how does the educator organize their lesson planning?
Please note: This article may contain some affiliate links.
Montessori Lesson Plan: The Elements
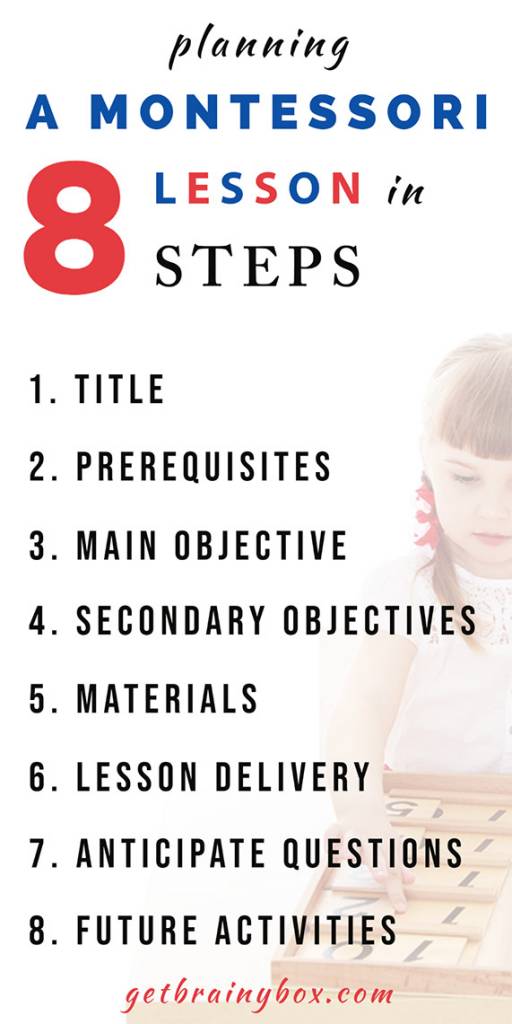
The most important elements an educator incorporates in his lesson plan are: naming lesson type, identifying prerequisites, setting objects and listing materials. Next, the educator carefully plans out the language she will use to teach the lesson. She will also anticipate some questions her student may ask. Finally, the teacher will conclude the Montessori lesson plan by naming future lessons and activities.
Tip: Scroll to the bottom of this article for a Pinterest friendly infographic designed to help you remember the lesson planning steps.
Step 1: Title the Lesson
The first step to creating a lesson plan is simple. Here, the teacher identifies the new skill he will be introducing to the student. In a primary classroom, a lesson title might be: “Making CVC words” or “Adding two single-digit numbers together.”
Step 2: List the Prerequisites
In the next step of creating a Montessori lesson plan, the educator will list the previously mastered skills, skills that are necessary to proceed with the new lesson.
Here, the educator must assess the student’s level of readiness for new information.
The questions he must ask himself include:
- Does the child demonstrate a good level of self-confidence to take on this new skill?
- Does the student have a reasonable level of organization to handle the new responsibilities associated with the new information?
- How well has she mastered pre-requisite skills?
- For an ELA lesson: Does the student have a good grasp of concepts such as phonemic awareness?
- For a math lesson: Does the child understand one to one correspondence?
Listing the prerequisites and asking the right questions is a crucial second step to writing an outstanding Montessori lesson plan.
Step 3: List the Main Objective of the Montessori Lesson Plan
It is important that a teacher identifies a clear set of objectives in step three of the Montessori lesson plan. Here, the teacher will list the main goal of the lesson. This objective might look similar to the lesson title but will include additional information.
A great objective includes specific requirements the student must meet before she is deemed to have mastered the lesson.
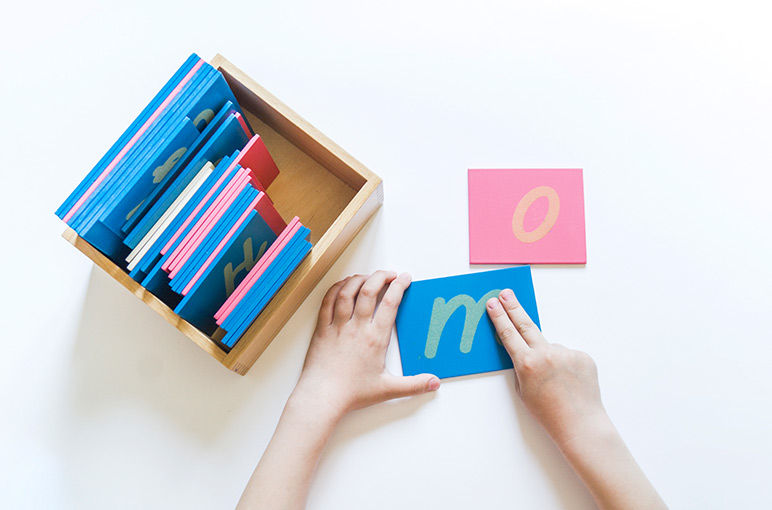
For example, if the title of the lesson is “Making CVC Words,” the main objective might be: “The student will be able to create three CVC words (top, mop, pop), using the moveable alphabet. The student will perform this task with 100% accuracy.”
Step 4: List the Bonus Objective
In addition to the main objective, which is directly aligned to the topic of the lesson, the teacher can identify bonus objectives. A bonus objective is any goal that the student meets as a natural result of the lesson.
For instance, let’s say a math lesson incorporates counting 10 pom balls using tongs. The main objective is for the student to understand the correlation of objects to numbers. And the bonus objective is to develop fine motor skills by squeezing the tongs.
It is always good practice for a Montessori teacher to look for bonus objectives, incorporate them in every planned activity.
Step 5: List the Materials
No great Montessori lesson plan can be executed without appropriate Montessori materials. Therefore, the next step to creating a lesson plan is to list every item you will use. Listing every little thing you need might seem tedious at first. But, if you spend any time rummaging through a pile of objects searching for a major but elusive material you need, you already know how much time this step saves.
A typical lesson plan might include objects such as a pencil, notebook paper, crayons, and Montessori 3-part cards.
Step 6: Plan the Montessori Lesson Delivery
By this point, the educator is already well organized. He knows exactly what the lesson is called and what pre-requisite skills the student needs. He is familiar with both main and secondary objectives. And he wrote out a list of Montessori materials for the lesson.
Armed with all this homework, the teacher is ready to plan how he will facilitate the lesson.
First things first. The teacher must decide where the lesson will take place, and how many students will participate in the lesson. In a homeschool or a Montessori classroom, the group is often only one student.
Once the decisions on where and how many have been made, the teacher must plan for how she will describe and model the new skill to the students.
This is an example of how an experienced Montessori teacher planned the second lesson delivery of the Amphibians and Reptiles Montessori Kit*:
❖ Invite your child to work with you.
– Reptiles and Amphibias Brainy Kit, Lesson 2
❖ Show and identify the photo and figurine of the lily pad. Say, “Lily pads are plants that you can see floating on the surface of a pond. Frogs and turtles often live near ponds. Both frogs and turtles are cold-blooded. This doesn’t mean there blood is cold, it means they are the same temperature as their environment. Sometimes a frog or small turtle will sit on a lily pad or a log to bask in sunlight and warm themselves.”
❖ Show the two pages with the drawings of lily pads. Say, “Let’s count these lily pads.” (There are 12).
❖ Continue, “Let’s put one animal on each lily pad.”
❖ Next take out the cards with photos of various frogs and turtles. Say, “I have some pictures of real frogs and turtles. Let’s see if you can find the figurine that matches the picture.”
❖ One at a time lay out the cards and name the frog or turtle. Have your child place the matching figurine on or next to the card. (The names are on the underside).
❖ Continue, “All animals need to protect themselves from predators (animals that might eat them). How do you think turtles protect themselves? (Their shells are hard.) Do you notice some of the frogs are brightly colored? This is a form of protection, too. Frogs don’t have shells, but some create a toxin, or poison. The bright colors warn predators that they are poisonous and will cause sickness or death if a predator chooses to eat them.”
❖ End with, “Next time we will learn more about turtles.
*All Brainy Kits come with 7 complete lesson plans, ready for implementation in the Montessori classroom or homeschool.
Step 7: Anticipating Questions
It is inevitable, that a student who is paying attention will have questions. A Montessori teacher often anticipates the questions that might come up. If she has worked with the child for some time, she might also know the unique struggles the student might face.
Step seven to creating the Montessori lesson plan is to anticipate the questions and how to address them. For instance, if the lesson includes the movable alphabet, one possible issue might be the student having trouble identifying a letter.
It is helpful to list both the potential questions and potential answers or solutions. If you are stumped, a quick google search could help you here. Remember, this part gets easier with practice too. The more you teach, the more you’ll find some questions and struggles are very common – and easy to anticipate. For instance, almost all children initially confuse letters b and d. And a quick google search of “how to tell letters b and d apart” will provide you with a wealth of potential solutions.
Step 8: List Future Activities
We are almost done with planning a Montessori lesson!
But, before you finish, its time to look towards the future. A great lesson plan should include two to three activities that will build off of this lesson. After all, the current lesson is only a pre-requisite for future lessons.
In this step, the teacher must ask herself “What skills can I teach once my student masters the skills in this lesson?” Having a teaching goal helps keep the teacher on track and ensures the information she covers is relevant and helpful to her students.
Remain Flexible: Unofficial Step 9 of the Montessori Lesson Plan
Although not strictly part of the Montessori lesson planning process, this is an important step nevertheless. It is important to keep in mind – no students are the same. No matter how great your lesson plan is, some flexibility is often necessary. If you find you must deviate from the lesson do not think of this as a failure. Instead, consider this a learning experience. With this new experience, your next lesson will be that much better.
After all – we are not just teachers and we are not only here to write a Montessori lesson plan. We are students too. Much like our students, as long as we keep learning, we will keep growing.
